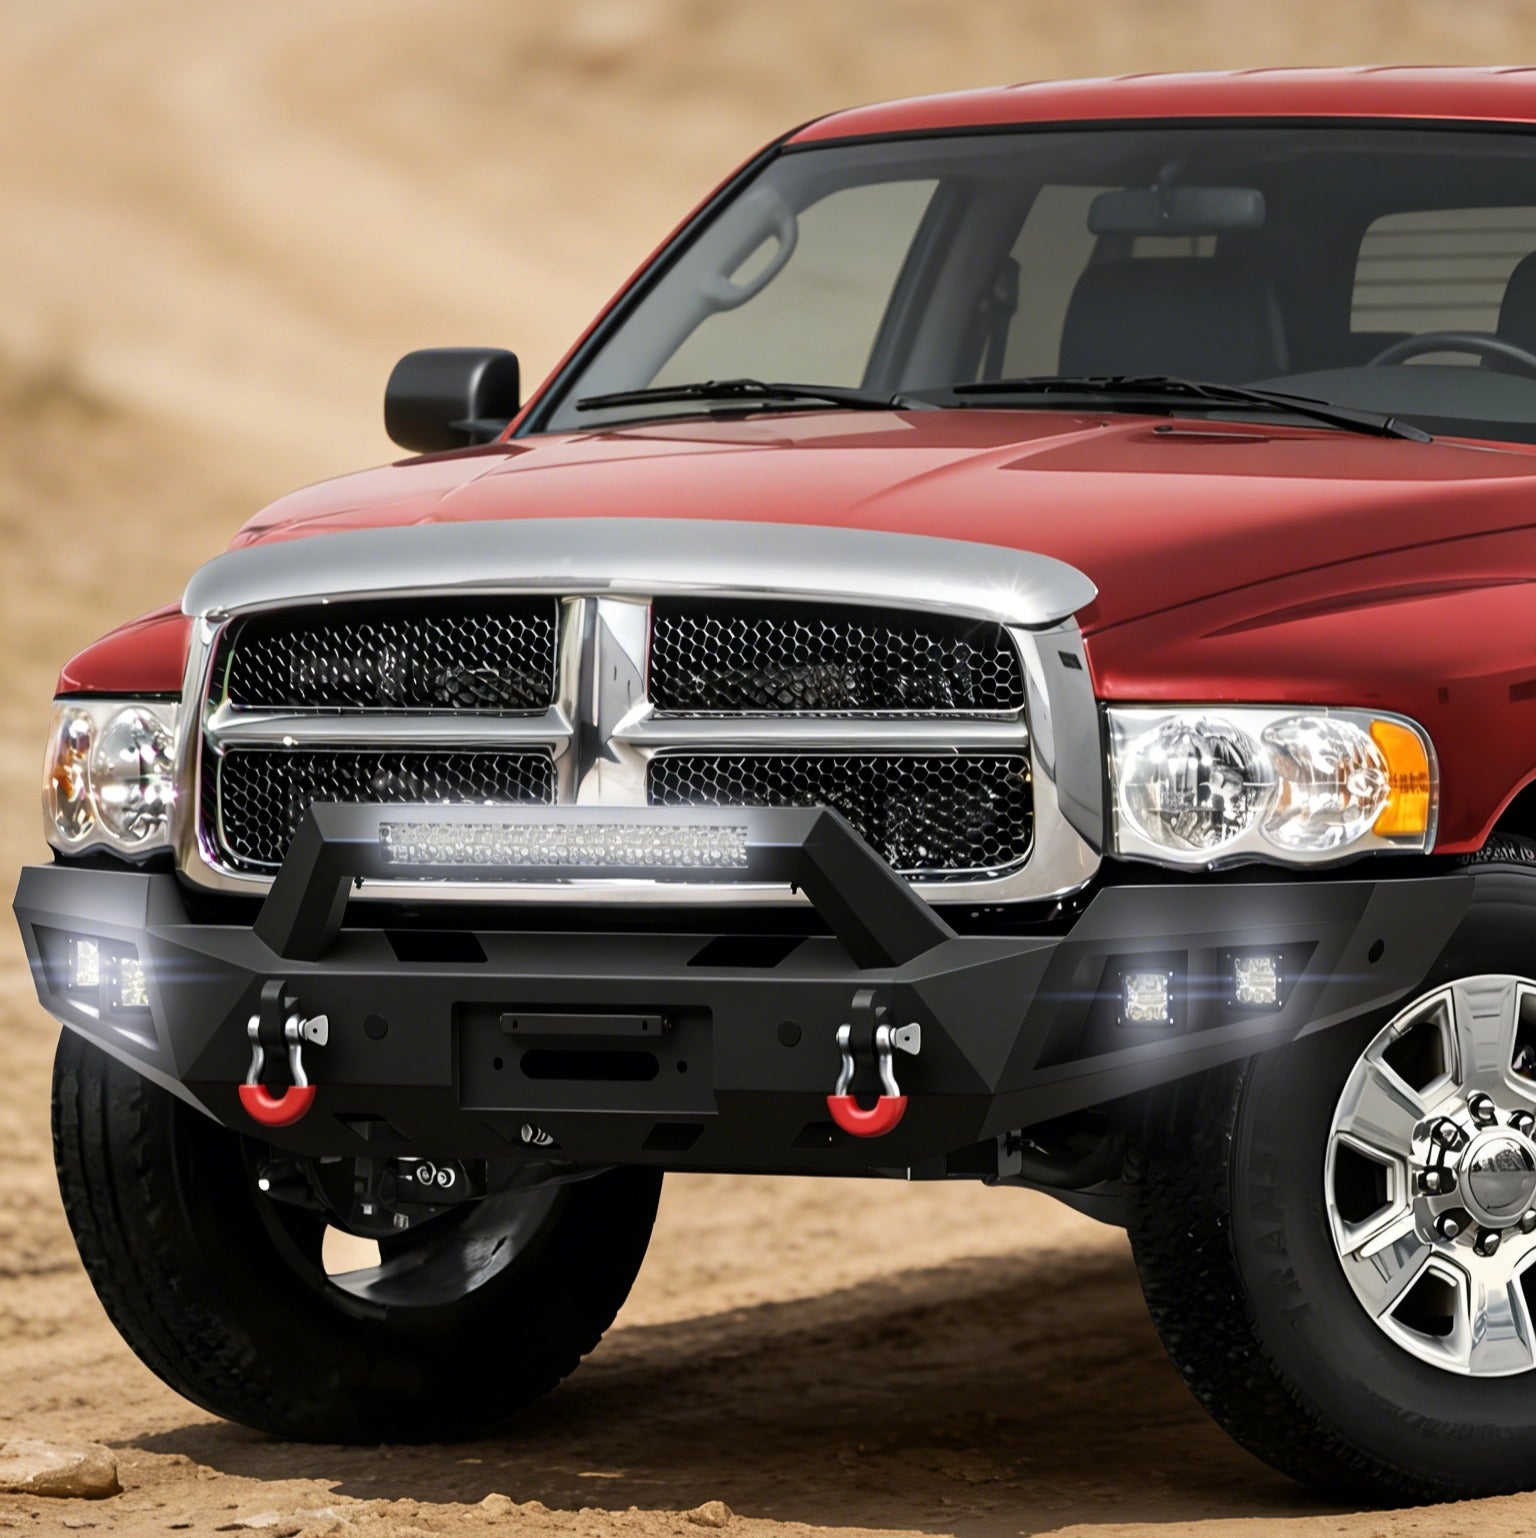
How I Replaced the Front Bumper on My 2017 Ram 1500: Ram 1500 Front Bumper DIY Installation Guide (Fits 2013–2018 Ram 1500)
I've owned my 2017 Ram 1500 Big Horn for several years and use it for daily driving, weekend trips, and occasional off-road runs. After trail damage and general wear left the factory front bumper looking rough, I decided to upgrade to the Ram 1500 front bumper aftermarket steel front bumper — a bolt-on replacement designed for 2013–2018 Ram 1500 models.

This guide documents my complete installation experience, including the tools I used, every step of the process, problems I ran into, and my honest impressions after months of driving with the new bumper.
If you're considering the same upgrade, you can view the full product details, specifications, and fitment information here. For those who want to review the installation steps before starting, we've also prepared a downloadable instruction guide below.
📄 Download Installation Instructions (PDF)
Why I Chose an Aftermarket Steel Bumper Over OEM
Before ordering, I compared OEM replacement bumpers and several aftermarket options. My requirements were clear:
- Direct bolt-on installation — no cutting or drilling
- Stronger protection than the factory plastic bumper
- Built-in LED lighting
- Recovery points for off-road use
- Complete mounting hardware included
The BP-R1003 met all of these requirements with heavy-duty steel construction, integrated LED lighting, built-in D-ring recovery points, and factory frame mounting compatibility.
Ram 1500 Front Bumper Compatibility: Which Ram 1500 Models Does It Fit?
The BP-R1003 is designed for the 2013–2018 Ram 1500 platform, covering:
- 2013 Ram 1500 front bumper replacement
- 2014 Ram 1500 front bumper replacement
- 2015 Ram 1500 front bumper replacement
- 2016 Ram 1500 front bumper replacement
- 2017 Ram 1500 front bumper replacement
- 2018 Ram 1500 front bumper replacement
The bumper uses factory frame mounting locations — no frame cutting or welding required. Always confirm your exact trim level, factory options, and sensor configuration before ordering.

Tools Needed for Installation
This installation does not require professional shop equipment. Here is what I used:
- 14mm socket wrench
- 17mm socket wrench
- Ratchet and extension
- Torque wrench
- Penetrating oil
- Wire stripper
- Electrical tape
- 12V test light
- Zip ties
- Safety gloves and safety glasses
- A second person to help lift the bumper
The most important tool is another set of hands. A steel bumper is significantly heavier than the factory plastic unit.
Step-by-Step Installation: 2017 Ram 1500 Front Bumper Replacement
Step 1: Assemble the New Bumper Before Removing the Factory Unit
I recommend assembling the BP-R1003 completely before touching the original bumper. The package includes:
- Main bumper body
- Left and right side wings
- LED lighting components
- D-rings
- Mounting hardware
Install the side wings first using the included M10 bolts. Do not fully tighten the wing bolts during initial assembly — leave them slightly loose so you can adjust alignment once the bumper is on the truck.
Step 2: Remove the Factory Ram 1500 Front Bumper
Before removing anything, disconnect the battery. This is especially important because you will be working around factory electrical connections.
- Remove factory bumper mounting bolts
- Disconnect fog light wiring if equipped
- Remove the factory bumper carefully
- Inspect the frame mounting points
My truck had rusty bolts — penetrating oil saved a lot of frustration. If your truck has seen several winters or road salt, expect the removal process to take longer.
Step 3: Install the Ram 1500 front bumper Steel Front Bumper
With help from a friend, we lifted the bumper into position and followed these steps:
- Align bumper mounting studs with factory frame holes
- Install M12 hardware — leave bolts slightly loose
- Adjust bumper position: check grille and headlight spacing
- Fully tighten all hardware once alignment is confirmed
Do not tighten everything immediately. The bumper needs small adjustments to achieve even gaps. Taking an extra 10 minutes during alignment makes a significant difference in the final appearance.
Step 4: Connect the LED Lighting System
The Ram 1500 front bumper includes a center LED light bar plus left and right LED lights. The wiring process is straightforward, but routing the wires correctly matters:
- Keep wiring away from exhaust heat
- Protect wires from sharp metal edges
- Use zip ties to secure the harness
- Check all connections before reconnecting the battery
If you are not comfortable working with vehicle electrical systems, professional installation is recommended.

What I Learned During Installation
The Weight Is the Biggest Challenge
The factory bumper is relatively light compared with a steel aftermarket bumper. The BP-R1003 Ram 1500 front bumper requires careful handling — having a second person made the installation much easier and safer.
Alignment Takes More Time Than Expected
The actual bolt installation was not the hardest part. The most time-consuming step was adjusting bumper height, left/right position, grille clearance, and headlight spacing. Do not rush this step — a properly aligned bumper makes the entire truck look professionally upgraded.
LED Wiring Requires Planning
I spent extra time routing the harness safely to avoid heat damage, wire rubbing, and future electrical problems. That extra effort was worth it.
OEM Ram 1500 Bumper vs Ram 1500 front bumper Aftermarket Steel Bumper
| Feature | Factory OEM Bumper | BP-R1003 Steel Bumper |
|---|---|---|
| Material | Factory plastic and reinforcement structure | Heavy-duty steel construction |
| Off-road protection | Limited | Improved protection |
| LED lighting | Factory lighting only | Integrated LED system |
| Recovery points | Usually requires additional accessories | Built-in D-rings |
| Installation | Factory replacement process | Bolt-on aftermarket upgrade |
| Appearance | Original factory style | Aggressive off-road style |
Common Mistakes When Installing a Ram 1500 Aftermarket Front Bumper
- Installing the bumper alone — a steel bumper is difficult to position correctly without help
- Tightening bolts too early — leave adjustment room until the bumper is perfectly aligned
- Ignoring wiring protection — poorly routed LED wires can eventually fail
- Forgetting final inspection — after installation, check bolt tightness, hood clearance, headlight gaps, and LED operation
After Several Months: My Honest Impressions
After months of driving with the BP-R1003, here is what I noticed:
- The truck has a much more aggressive front-end appearance
- The steel construction feels significantly stronger than the factory unit
- The integrated lighting improves visibility at night
- The D-rings have been useful in recovery situations
The biggest difference compared with the factory bumper is confidence. The truck feels better prepared for rough roads and outdoor trips.
Frequently Asked Questions
Does the Ram 1500 front bumper fit a 2017 Ram 1500?
Yes. The Ram 1500 front bumper is designed for 2013–2018 Ram 1500 models and uses factory mounting locations.
Can I install a Ram 1500 aftermarket bumper myself?
Yes, if you have basic mechanical skills and the proper tools. The installation is straightforward, but having a second person helps because of the weight.
Does this bumper require drilling?
No. The Ram 1500 front bumper is designed for a bolt-on installation without frame modification.
Will the factory parking sensors work?
Compatibility depends on your truck configuration. If your Ram 1500 has factory parking sensors, confirm sensor compatibility before purchasing.
How long does installation take?
My complete installation took approximately 6 hours, including bumper assembly, removal of the factory bumper, alignment, and LED wiring.
Final Thoughts: Is a Steel Ram 1500 Front Bumper Upgrade Worth It?
Replacing the factory bumper on my 2017 Ram 1500 was one of the most noticeable upgrades I have done. The Ram 1500 steel front bumper delivered stronger front-end protection, improved off-road capability, integrated LED lighting, and a more aggressive appearance.
For Ram 1500 owners looking for a 2017 Ram 1500 front bumper replacement — or anyone upgrading a 2013–2018 model — this bolt-on steel bumper is a practical option that can be completed at home with basic tools.
Before purchasing, always verify vehicle compatibility and follow proper installation and safety procedures. A good bumper upgrade is not just about appearance — it is about building a truck that better matches how you use it.